Inconsistent print quality and unplanned downtime on screen printing lines are rarely caus...
 Jul 01,2026 May 25 , 2026
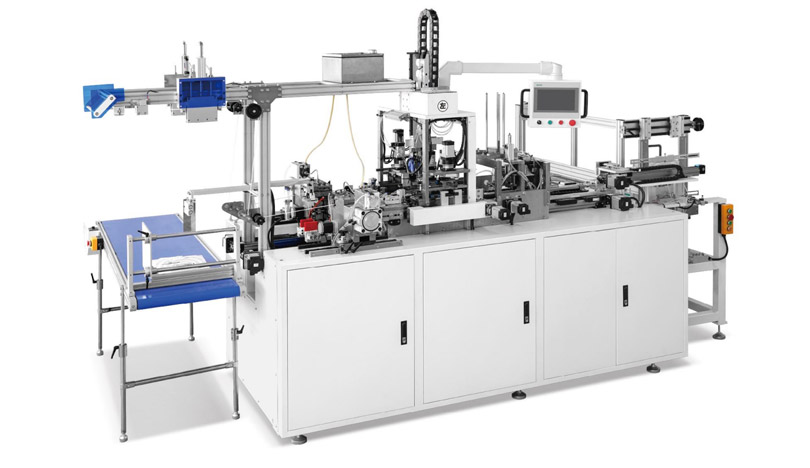
Setting up your first roll‑fed laminator can feel intimidating. Between adjusting temperature, speed, and roller pressure, it’s easy to worry about wasting materials or damaging the device. Yet once you understand the basic workflow, the process becomes logical and repeatable.
This guide is written for complete beginners. We’ll break down every stage of the initial setup, highlight frequent errors, and share practical advice that saves you time and frustration. No advanced technical background required.
Start by placing the machine on a sturdy, level workbench. Ensure there is enough clearance on both sides for feeding and receiving materials. Remove all transport locks, adhesive tapes, and foam padding. Many machines include a wrench or Allen key – keep it close because you may need it for minor roller adjustments later.
Check the power cord, foot pedal (if included), and any additional rollers or shafts. Verify that the rollers rotate freely by hand. If you feel stiffness, refer to the manufacturer’s manual to release shipping clamps.
Why this matters: A stable and clean workspace prevents dust from sticking to rollers and ensures even pressure distribution. Most feeding issues trace back to an uneven table or forgotten transport locks.
Plug the laminator into a grounded outlet that matches the machine’s voltage rating (usually 110V or 220V). Do not use an extension cord unless absolutely necessary – voltage drop can affect heating consistency. Turn on the main power switch. The control panel will light up, and the temperature display will start showing ambient temperature.
Before heating, make sure no flammable objects are near the rollers. Remove wristwatches, loose sleeves, and long necklaces. For first‑time users, it’s wise to wear heat‑resistant gloves when handling hot rollers later.
Incorrect film loading causes 80% of jams and wrinkles. Most automatic laminators use a two‑shaft system – one for the top film roll and one for the bottom. Follow this sequence:
Place the film rolls onto their shafts with the adhesive side facing the rollers. The glossy (release liner) side should contact the roller surface.
Tighten the core adapters or locking cones firmly so the rolls cannot wobble.
Unwind about 30 cm of film from each roll. Peel the two layers apart slightly to create a “lip” – this helps feed into the nip.
Insert the lip between the rollers while pressing the “roller lift” or “feed” button. Some machines require you to manually crank a few turns.
Common beginner mistake: Loading the film backwards (adhesive side out). This wraps glue directly around the rollers, requiring a messy cleanup. Always double‑check the roll orientation before locking.
These three parameters work together. A common error is focusing only on temperature while ignoring speed matching.
Temperature – Start with the film manufacturer’s recommended value. For standard 1.5 mil thermal film, 105–115°C (220–240°F) is typical. Thicker film (3 mil) may need 120–130°C. Set the temperature and wait 10–15 minutes for the rollers to heat evenly.
Speed – Beginners should begin at the slowest setting (e.g., 1.5–2 m/min). Slower speed gives more reaction time and better bonding. Increase speed only after successful test runs.
Pressure – Turn both side pressure knobs equally, usually clockwise, to increase. A good starting point: set the pressure so that a folded piece of paper inserted between the rollers can be pulled out with light resistance. Excessive pressure squeezes out adhesive; too little leaves bubbles.
Pro tip: Keep a setup log. Note the temperature, speed, and pressure that work well for each film brand. This log becomes invaluable when switching materials.
Never start with your final print. Grab a scrap sheet of coated paper or inexpensive poster board – the same thickness as your target media. Run the test at your chosen settings. Watch for:
Wrinkles – Usually caused by uneven film tension or skewed roller alignment. Re-centre the film rolls.
Bubbles or silvering – Temperature too low or speed too high. Increase the temperature by 5°C or reduce the speed.
Curling output – Excessive temperature or pressure. Reduce both slightly.
If the test sheet comes out flat and clear, you’re ready for production. If not, adjust one variable at a time. Changing multiple settings simultaneously makes troubleshooting impossible.
Film doesn’t advance – Check if the safety guard is fully closed. Most automatic machines have interlock switches that stop the rollers when the guard is open.
Uneven gloss across the width – Pressure is higher on one side. Re‑balance the two pressure knobs using a feeler gauge or simple paper‑pull test.
Roller marks on prints – Rollers may have residual adhesive or debris. Clean them according to your manual (usually with a soft cloth and isopropyl alcohol while rollers are warm – not hot).
Machine stops mid‑run – Overload protection triggered. Turn off, wait 5 minutes, then restart. Reduce feed speed or material thickness.
Once you master the core workflow, you can explore advanced features like reverse function for removing stuck media, automatic film saving (cuts film between jobs), or variable speed profiles for textured substrates. Many commercial laminators also include a cooling fan system that prevents output sheets from sticking together.
If you’re looking for a reliable workhorse that handles daily operation with minimal adjustments, consider exploring professional laminating equipment built for consistent results. It offers precise digital temperature control and tool‑free roller changes – features that reduce setup time once you’re ready to upgrade.
Clean rollers after every shift – Residual adhesive hardens and creates repeating marks.
Store film in a cool, dry place – Humidity degrades the adhesive layer.
Calibrate temperature every 6 months – Use a surface thermometer to check actual roller temperature against the display.
Setting up an automatic laminator for the first time is a skill, not a talent. By following this structured process, you’ll avoid the most common frustrations and produce consistently high‑quality laminates from day one.
Disclaimer: Always refer to your specific machine’s manual for safety and operational instructions. The settings mentioned are typical values; your equipment may require different parameters.
Jul 01,2026Jun 24,2026Jun 15,2026
40 pcs/min Production Speed
Φ5mm (Customizable) Rope hole Dia
110mm Hand rope length
35-45 pcs/min Production speed
30-130mm Width Tag size
60-130mm length Tag size
40-50pcs/min Production speed
50-220mm Paper bag hole distance
300-480mm (Including rope tension) Rope length
-Full-Automatic-Paper-Handbag-Buckle-Threading-Machine.jpg)
40-50pcs/min Production speed
75-170mm Paper bag hole distance
300-480mm Rope length
35-40 pcs/min Production speed
65-200mm Hole distance
340-520mm (Including rope tension) Rope length
35-50 pcs/min Production speed
68-170mm Paper bag hole distance
300-480mm Rope length


Analysis
Consultation
Solution proposal
Quote
GET A QUOTE

E-Mail : [email protected]

Wechat / WhatsApp / Cell :+86- 13587960872

Adress :No. 508, East Third Road, Gexiang High tech Industrial Park, Rui'an City, Zhejiang Province China
Get in Touch
Copyright2024. Ruian Hongqiang printing Machinery CO. LTD. All Right Reserved SiteMap